The Battle of Hlobane, fought on March 28, 1879, during the Anglo-Zulu War, represents a significant moment of conflict between British forces and the Zulu nation. This encounter, which unfolded near Vryheid in KwaZulu-Natal, illustrated the complexities of military strategy and the unforeseen repercussions of battlefield dynamics. You will explore the tactical maneuvers employed by British General Chelmsford and Colonel Evelyn Wood, who sought to engage Zulu forces while contending with the limitations posed by prior defeats and logistical challenges.
The analysis will encompass the formation of British forces, the initial assault on Zulu camps, and the eventual entrapment faced by Wood’s column in the face of a vastly superior Zulu contingent. You will gain insight into the consequences of miscommunication and strategic errors that led to substantial British casualties and a temporary Zulu triumph, despite the later defeat of the Zulus in subsequent engagements. This examination will contribute to a nuanced understanding of the interplay between military strategy and on-ground realities during this pivotal conflict.
The Battle of Hlobane: An Academic Analysis

Background of the Anglo-Zulu War
Overview of the Anglo-Zulu War
The Anglo-Zulu War (1879) was a pivotal conflict arising from British colonial ambitions in southern Africa. Following a series of aggressive policies aimed at consolidating control over the region, the British sought to bring the Zulu nation, an increasingly powerful and independent entity, under their dominion. Tensions escalated during the early months of 1879, culminating in an outright invasion of Zululand by British forces, led by General Lord Chelmsford. The war was characterized by fierce battles, moments of unexpected triumph for both sides, and profound consequences for the indigenous Zulu people.
Key Motivations Behind British Expansion in Zululand
The motivations driving British expansion into Zululand were both strategic and economic. Strategically, the British sought to secure their interests against the backdrop of a rapidly changing geopolitical landscape in southern Africa. Control over Zululand would not only provide a buffer against rival colonial powers but also facilitate British influence over the trade routes and resources in the region. Economically, the Zulu territory was rich in resources and agricultural potential, offering a lucrative opportunity for exploitation. The desire to subdue the Zulu nation reflected a broader pattern of colonial expansion characterized by militaristic intervention and cultural supremacy.
Initial Encounters Between British and Zulu Forces
The lead-up to the Anglo-Zulu War involved several key encounters that set the stage for the eventual conflict. Notably, prior skirmishes highlighted the efficacy of Zulu military formations and tactics, which were based on close-quarters combat and a deep understanding of the local terrain. The British, unaccustomed to such warfare, experienced significant setbacks, including the humiliating defeat at the Battle of Isandlwana on January 22, 1879, where the Zulu forces decimated a well-armed British battalion. Such encounters prompted British commanders, including Chelmsford, to reassess their strategies moving forward.
Prelude to the Battle of Hlobane
General Chelmsford’s Strategic Objectives
As the conflict progressed, General Chelmsford’s objectives became increasingly clear: he intended to defeat the Zulu army decisively and, in doing so, secure British hegemony over Zululand. After the defeat at Isandlwana, Chelmsford recognized the need for a more nuanced approach to engagement, one that involved the use of diverging troop movements to flank and disorient the Zulu forces.
The British Invasion Plan and Troop Movements
In the weeks leading up to the Battle of Hlobane, Chelmsford devised a multi-pronged invasion plan that involved three primary columns converging on the Zulu capital of Ulundi. The fourth column, under Colonel Evelyn Wood, was tasked with diverting attention away from the main British thrust. Wood’s column, consisting of approximately 1,500 troops, was positioned to harry secondary Zulu forces while also strengthening the British foothold in Zululand.
The Role of Colonel Evelyn Wood’s Fourth Column
Colonel Wood’s fourth column was significant not only for its size but also for its strategic role in the overall invasion plan. Wood was directed to conduct operations that would engage regional Zulu forces and prevent them from reinforcing central Zulu armies, thus facilitating the movement of other British columns. However, Wood’s command was ultimately faced with unforeseen challenges, necessitating swift adjustments to deal with the evolving battlefield situation.
The Forces at Hlobane
Composition of British Forces Under Colonel Wood
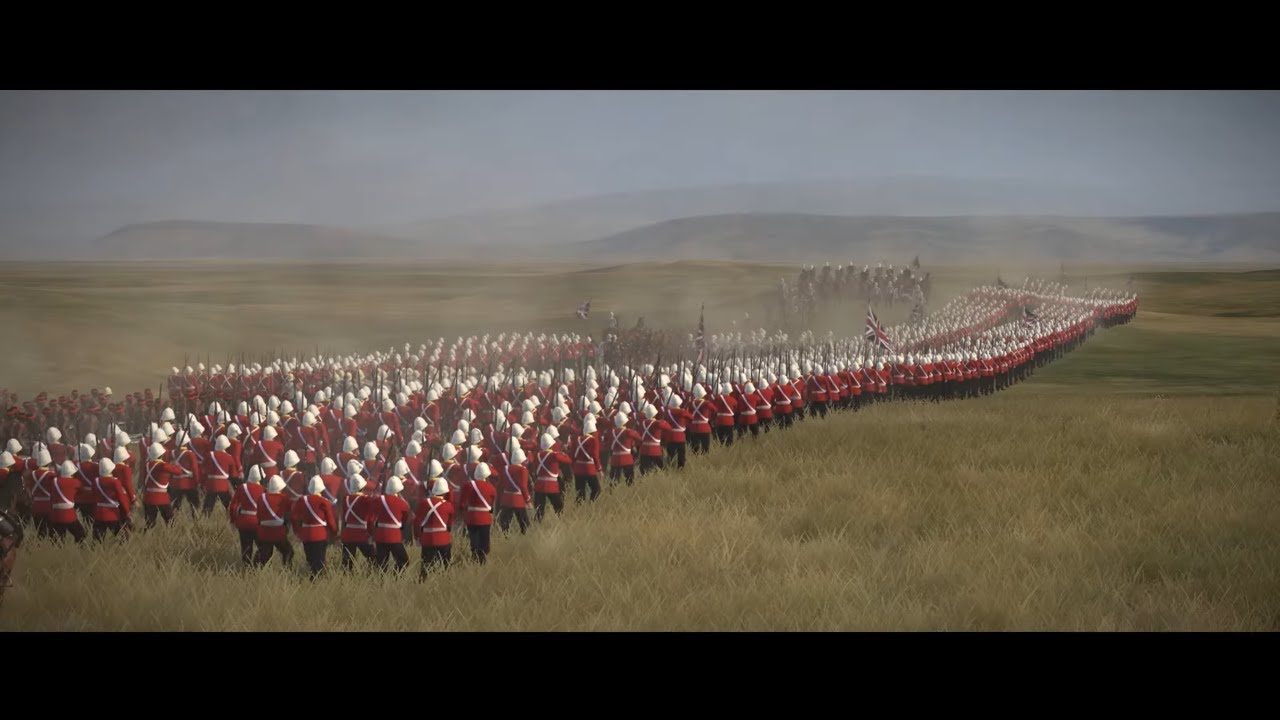
Wood’s force at Hlobane, marked by diversity in units, reflected the British military’s reliance on both regular and irregular combatants. Consisting of infantry companies, mounted troops, artillery, and local auxiliary forces, this contingent faced the daunting task of engaging a numerically superior enemy. The combination of technological advancements, such as firearms and artillery, alongside more traditional warfare tactics, posed a unique advantage yet also revealed vulnerabilities, particularly in maneuverability and troop morale.
Overview of Zulu Forces and Their Commanders
In stark contrast, the Zulu forces, totaling around 20,000 warriors, were led by experienced commanders well-versed in guerrilla warfare and mobile engagements. Their traditional regiments, known as “impis,” employed intricate tactics that leveraged their superior numbers and intimate knowledge of the terrain. This strategic cohesion among Zulu commanders stood as a stark reminder of the perils that awaited the British forces at Hlobane.
Comparison of Troop Strengths and Resources
The disparity in numbers between British and Zulu forces at Hlobane was striking. While Wood commanded a fraction of the Zulu force, the British did benefit from heavier artillery and access to supplies, courtesy of their colonial administrative support. However, the underestimation of Zulu capabilities in flexible engagements proved to be a significant oversight that would underline the ensuing confrontation.
Terrain and Environment of the Battlefield
Geographical Significance of Hlobane
The geographical layout of Hlobane was critical in shaping the dynamics of the battle. Nestled between elevated plateaus and steep ridges, the region offered both advantages and disadvantages to the contending forces. The British forces would struggle against the terrain’s demands, especially given their reliance on mounted troops to execute rapid maneuvers, while the Zulus adeptly utilized the high ground for tactical advantage.
Difficulties Posed by the Terrain for Both Sides
As the conflict unfolded, the challenging terrain presented formidable obstacles for both the British and Zulu forces. The rugged landscape limited movement, creating bottlenecks and hampering strategies that would have otherwise allowed for an effective engagement. British troops, in particular, found the ascent to Hlobane itself arduous, illustrating the challenges of pre-modern battles where environmental factors consistently influenced outcomes.
Weather Conditions on the Day of Battle
The weather on March 28, 1879, was an additional complicating factor. The day began with favorable conditions for the British, yet as the hours wore on, atmospheric shifts brought about increased humidity and cloud cover. Such fluctuations not only affected visibility but also influenced troop morale and performance in battle, compounding the challenges of the officers who led their men into unforeseen strife.

The Initial Assault
Tactics Employed by Colonel Wood’s Troops
Upon commencing the assault at Hlobane, Colonel Wood’s troops executed a strategy that involved multiple frontal assaults. Designed to leverage rapid movement and surprise, these tactics initially yielded some success, allowing British troops to reach the Zulu camp. However, the lack of reconnaissance contributed to a misunderstanding of Zulu troop positions, leading to dire consequences as they came under overwhelming fire.
Zulu Defensive Strategies and Preparations
In vivid contrast to the British approach, the Zulu forces were prepared for a fight. They had fortified their positions and were organized in a way that maximized their defensive posture. Known for their rapid mobilization, the Zulu combatants were able to encircle advancing British troops effectively, using their knowledge of the land and established formations to maintain an upper hand in the chaos of battle.
Impact of Captain Campbell’s Death on British Morale
The death of Captain Campbell during the initial assault proved to be a turning point in the engagement. His fall not only removed an experienced leader from the British ranks but also shattered the morale of the troops who were present. The incident epitomized the frailty of British resolve in the face of Zulu might, leading to hesitation and disarray among Wood’s men at a critical juncture in the battle.
Chaos and Confusion on the Battlefield
The Dynamics of Communication Failures
As the battle unfolded, a significant theme emerged: the failures of communication among British forces. Orders issued by Colonel Wood were often misconstrued or not relayed effectively, resulting in disjointed movements and an inability to coordinate attacks. This lack of clarity not only bred confusion within the ranks but also undermined the overall strategic intent of the invasion.
Isolation of Buller’s Force and Its Consequences
The isolation of Lieutenant Colonel Buller’s force became a dire reality amid the rapidly changing battlefield conditions. Misdirection and breakdowns in command structure left Buller’s troops vulnerable to encirclement. Rather than regrouping effectively, Buller found himself cut off from critical reinforcements, sowing the seeds of panic amongst his soldiers.
The Rapid Encirclement by Zulu Forces
The Zulu forces, taking advantage of the disorganization among British ranks, successfully executed a maneuver that encircled Buller’s positions. The speed and decisiveness of the Zulu attack were indicative of their military acumen, enabling them to capitalize on British vulnerabilities quickly. The sheer number of Zulu warriors served to disrupt any semblance of control that Wood’s forces hoped to maintain.

The Retreat Through Devil’s Pass
Challenges Faced During the Retreat
Retreating through Devil’s Pass was fraught with danger. The narrow pathways provided little room for maneuver, and the Zulu forces pursued the British relentlessly. Troops faced the dual challenge of combating Zulu attacks while navigating treacherous terrain that not only restricted their movements but also incited chaos among the ranks.
Leadership Decisions by Colonel Wood and Major Russell
The leadership decisions made during this retreat were pivotal. Colonel Wood’s initial orders aimed at preserving troop integrity seemed increasingly beleaguered by the fast-moving events on the ground. Meanwhile, Major Russell’s officers faced immense pressure from their own command during a time when clarity was paramount. The consequences of indecision further hindered the already compromised retreat efforts.
Casualties and Losses Incurred in the Withdrawal
As the retreat unfolded, British forces suffered devastating losses, with estimates recounting 15 officers and 110 soldiers killed. The toll among native supporters further exacerbated British casualties, as they faced systemic challenges during their exodus. The horrific scene served not only as a moment of profound tragedy but also highlighted the dire consequences of underestimating an opponent as formidable as the Zulus.
Casualties and Aftermath
Detailed Account of British Casualties
The aftermath of the Battle of Hlobane revealed a staggering loss of life among British troops. The total casualties, including both fatalities and injuries, underscored the futility of Wood’s tactical plan and the dire state of British military leadership during the engagement. For many in Britain, the death toll echoed the growing concern regarding the viability of colonial ambitions in the face of determined local resistance.
Impact on Zulu Forces Following Their Temporary Victory
While the Zulus achieved a temporary and significant victory at Hlobane, the ramifications of their success soon became apparent. Despite their strategic gains, the Zulu forces faced pressures that would ultimately lead to their defeat in subsequent confrontations. The fleeting triumph served as a reminder of the complex realities of warfare, where moments of victory can quickly dissolve in the wake of broader strategic failings.
Strategic Implications of the Battle for Both Sides
In the wake of the Battle of Hlobane, the strategic implications for both British and Zulu forces would shape the course of the war. For the British, the need for a reevaluation of military tactics became evident, as operational overreach led to tactical defeat. Conversely, Zulu commanders recognized the necessity of sustaining momentum, leveraging their victory to rally further resistance against British forces in the days that followed.
Lessons Learned from the Battle of Hlobane
Strategic Errors Made by the British
The Battle of Hlobane illuminated several strategic errors committed by British commanders. Overconfidence in their military superiority blinded leaders to the realities of effective Zulu warfare. Furthermore, inadequate intelligence and poor logistical coordination contributed to a disjointed campaign that ultimately undermined the goals of British invasion.
Importance of Communication and Reconnaissance
In combat, communication is paramount, and the British experience at Hlobane underscores this reality. Failures in relaying commands clearly and accurately resulted in missed opportunities and heightened chaos. Concurrently, the absence of thorough reconnaissance limited commanders’ awareness of Zulu movements, further exacerbating the British woes on the battlefield.
Consequences for Future Engagements in the Anglo-Zulu War
The lessons gleaned from the Battle of Hlobane extended far beyond its immediate aftermath. Subsequent engagements in the Anglo-Zulu War would see British commanders adopting a more cautious approach, emphasizing better coordination, preparation, and troop welfare. Nevertheless, the scars of Hlobane would linger, influencing military strategies and colonial discourse throughout the duration of the conflict.
Conclusion
Summary of Key Events and Outcomes from the Battle
The Battle of Hlobane serves as a vivid testament to the complexities and tragedies of warfare during the Anglo-Zulu War. From the initial assault to the calamitous retreat through Devil’s Pass, each phase highlights a narrative marked by bravery, confusion, and staggering loss on both sides. The rivalry between the British and Zulu forces drew stark lines of conflict that would ultimately shape the course of history in the region.
Reflections on the Significance of the Battle of Hlobane
Hlobane is significant not merely as a moment in military history but as a reflection of the enduring tensions between imperial ambition and local sovereignty. The complexities of this engagement reveal deeper truths about colonialism, addressing themes of respect, recognition, and coexistence that resonate in contemporary discourse on power and resistance.
Legacy of the Battle in the Context of the Anglo-Zulu War
The Battle of Hlobane stands as a pivotal event that reshaped the trajectory of the Anglo-Zulu War and remains a critical touchstone for understanding the multifaceted nature of colonial conflict. Its legacy extends beyond its immediate aftermath, influencing military strategies, cultural narratives, and discussions about the consequences of war in an increasingly interconnected world. As such, Hlobane is an enduring reminder of the lessons that history imparts to contemporary society regarding conflict, leadership, and the quest for understanding in times of tribulation.