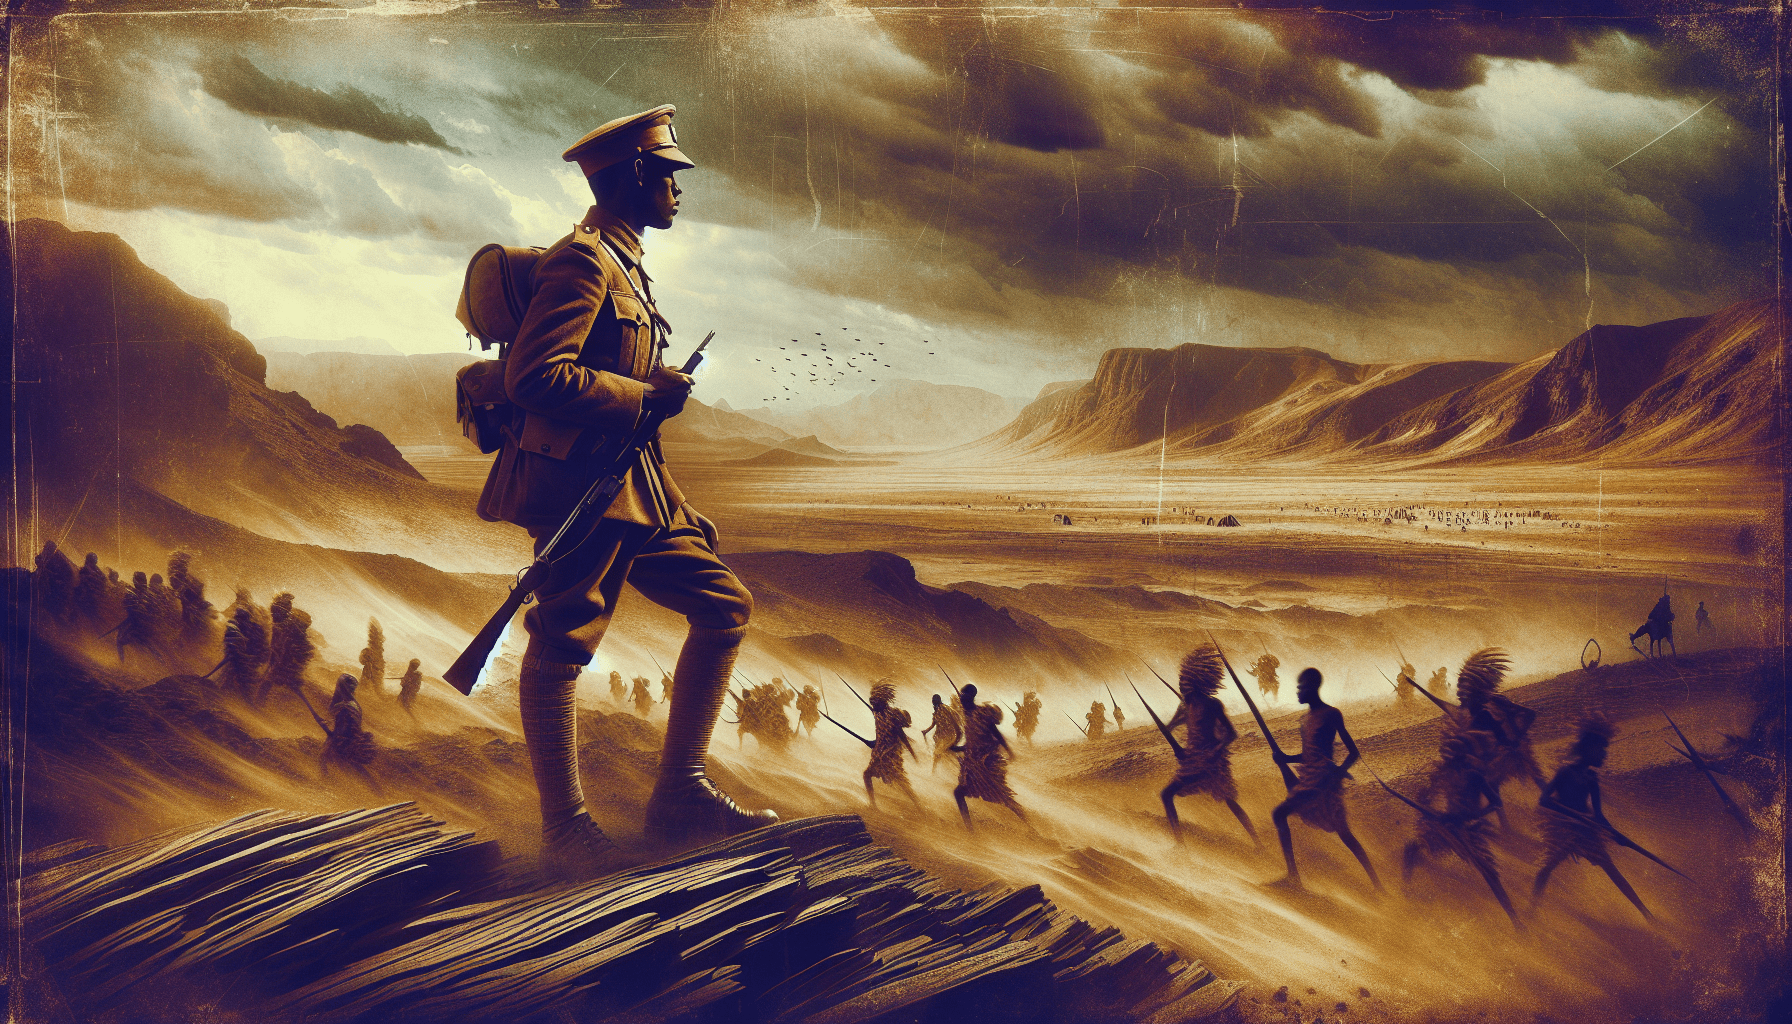
The Battle of Abu Klea, occurring from January 16 to 18, 1885, stands as a significant event in the context of British colonial aspirations in Sudan. This confrontation involved a formidable British Desert Column, comprising approximately 1,400 soldiers, who aimed to relieve General Charles Gordon besieged in Khartoum. The actions taken by British forces against the Mahdist army reflect a complex interplay of military strategy, colonial ambition, and local resistance. Understanding the battle’s intricacies highlights broader themes in colonial history and the resistance faced by imperial powers.
In examining the events leading up to the battle, you will encounter the socio-political landscape of mid-19th-century Sudan, marked by rising nationalist sentiment fueled by Muhammad Ahmad, the self-proclaimed Mahdi. The ensuing conflict underscored the fragility of British control over strategically vital territories while illuminating the fierce determination of local tribesmen to expel foreign influence. Various facets of the combat, from troop formations to the fierce engagement in the desert terrain, will be detailed, offering insights into the operational challenges and impacts of this historic struggle.
Historical Context of the Battle
The Sudanese Uprising
The Sudanese Uprising, which spanned from 1881 to 1899, marked a significant revolt against foreign rule, particularly against the Egyptians and later, the British. At its helm was Muhammad Ahmad, who proclaimed himself Al-Mahdi, or “the guided one,” in a bid to unify the Sudanese people under a banner of religious revival and resistance. His message resonated deeply, igniting a fervor among locals who sought to reclaim sovereignty from what they considered foreign invaders. The uprising burgeoned with rapid momentum, as tribes across Sudan began to assert their identities and challenge the authority of both the Ottoman-Egyptian administration and the encroaching British interests. This context underscored the complexities of colonialism, as local grievances were often couched in religious and nationalist sentiments.
The British Empire’s Interests in the Region
For the British Empire, Sudan represented an intersection of strategic and economic interests. Positioned prominently along the Nile River, it served as a critical link to the Suez Canal—an essential maritime route for British trade and military logistics. The economic allure of Sudan, rich in resources and agricultural potential, further intensified British ambitions. As the Mahdist movement began to challenge Egyptian authority, the British government perceived a dual threat: the destabilization of its empire and the potential loss of control over access to crucial trade routes. Thus, the British intervention was propelled not only by economic motives but also by a desire to curb the expansion of Mahdist influence, which they feared could inspire uprisings in other colonies.
Key Figures Leading to the Conflict
Among the key figures in this tumultuous period was General Charles Gordon, a British army officer renowned for his earlier military exploits in China and his charismatic leadership. Tasked with overseeing the evacuation of Egyptian troops in Sudan, Gordon’s fortifications in Khartoum and refusal to retreat from the siege heightened tensions and set the stage for a protracted conflict. His decisions drew the ire of British officials, who saw both the potential for disaster and the necessity of intervention. The British response came in the form of the Gordon Relief Expedition, under General Sir Garnet Wolseley, whose expeditionary force aimed to relieve Gordon’s besiegement while reasserting British control over Sudan.
Prelude to the Battle
The Gordon Relief Expedition
The Gordon Relief Expedition was a military mission launched in response to the dire situation in Khartoum, where General Gordon had been isolated by Mahdist forces since the spring of 1884. As news of Gordon’s staunch defense reached Britain, the government resolved to dispatch reinforcements. This military endeavor, which commenced on December 30, 1884, was characterized by logistical challenges, including the harsh environment of the Bayuda Desert. The expedition’s dependence on speed and surprise was critical, for each passing day increased the peril facing Gordon and diminished British influence in Sudan.
Formation of the British Desert Column
The British Desert Column, comprising approximately 1,400 soldiers from various regiments, was one of the core elements of the relief force. This unit was characterized by its diverse composition, including infantry, engineers, and artillery teams, each of which played an essential role in project operations across challenging terrain. The inclusion of the Camel Corps, composed of soldiers mounted on camels, added a unique dimension to British capabilities, enhancing mobility across the unforgiving desert landscape. However, despite their advantages, the column faced daunting challenges in navigating the terrain and organizing cohesive tactics under hostile conditions.
Challenges Faced During the March
The march towards Khartoum was beleaguered by treacherous conditions, ranging from extreme dehydration to ambushes by Mahdist scouts. Sandstorms and the unrelenting heat tested the fortitude of the British soldiers as they traversed the Bayuda Desert. Moreover, logistical mismanagement led to shortages of food and water, exacerbating the physical and mental strains faced by the men. These challenges foreshadowed the difficulties that would arise during the subsequent battle at Abu Klea, where the British would need to rely on discipline and strategic formations to counter a numerically superior adversary.

Overview of the Forces
Composition of the British Desert Column
The British Desert Column was an amalgamation of regular infantry and specialized units, which included the Royal Engineers and the Royal Artillery. These soldiers were equipped with the latest weaponry of the time, such as the breech-loading Martini-Henry rifles. The inclusion of the Camel Corps was particularly significant, as the unit provided essential logistical support and enhanced mobility, enabling the British to navigate the harsh desert terrain more effectively than traditional cavalry. This diversity within the ranks facilitated a multi-faceted approach to military engagement but also highlighted the challenges of coordinating operations among disparate units.
The Mahdist Army: Strengths and Weaknesses
The Mahdist forces, amassing between 3,000 to 5,000 fighters, were primarily composed of local tribesmen armed largely with traditional weaponry, such as spears, swords, and a smaller contingent equipped with single-shot rifles. Their strength lay in their knowledge of the local terrain and their capacity to employ guerrilla tactics against a more organized foe. However, their lack of formal military training and heavier artillery represented a significant disadvantage in direct confrontations. The Mahdists’ fervent motivation and united cause, under the leadership of charismatic commanders, often outweighed their material disadvantages in the face of British military discipline and technology.
Role of the Camel Corps
The Camel Corps emerged as a critical component of British military operations in the Sudan. Their unique adaptability allowed for improved mobility and transport capabilities across parched and uneven landscapes. The camels provided essential support in carrying supplies and personnel, alleviating some logistical difficulties faced by infantry troops. Additionally, their use lent a distinct advantage during both reconnoitering missions and skirmishes. In the impending Battle of Abu Klea, the Camel Corps’ strategic placement and swift maneuverability would prove vital against the Mahdist forces’ rapid assaults.
Strategic Importance of Abu Klea
Geographical Significance
Abu Klea’s geographical positioning rendered it a critical juncture in the British Relief Expedition. Situated near key routes leading to Khartoum, its capture or defense would dictate the momentum of the entire campaign. For the British, controlling Abu Klea meant ensuring safe passage toward their primary objective: to relieve General Gordon and establish authority over Sudan. From a military standpoint, the location offered advantageous high ground and a favorable defensive posture from which the British could exploit their artillery capabilities against the Mahdist forces.
Logistical Considerations
The logistics of the campaign demanded careful planning and execution, particularly concerning supply lines and troop movements. Abu Klea served not merely as a battlefield but as a strategic staging ground that allowed the British to regroup and bolster their forces before advancing. The logistical infrastructure in place, including water sources and supply caches, would be instrumental in offsetting the inevitable confrontations with Mahdist troops. Without such logistical forethought, the British would risk incurring additional casualties and operational setbacks in the face of persistent opposition.
Previous Conflicts in the Region
The region surrounding Abu Klea had witnessed numerous conflicts over the years, contributing to an environment charged with animosity and anticipation of further military engagements. Earlier confrontations between Egyptian and Mahdist forces had set a precedent for large-scale combat, which the British now found themselves entangled in. Understanding the geopolitical history of Sudan, including previous uprisings, rivalries among tribes, and past battles, was essential for the British commands as they calculated their strategic options and assessed their potential for success in the forthcoming battle.

Tactical Formations and Preparation
The British Square Formation
As the conflict approached its acute phase, the British forces relied on the classic “square” formation, known for its defensive capabilities in combat. This formation involved troops positioning themselves in a square, with cavalry and artillery stationed at key points to provide support. The square’s design facilitated mutual protection among soldiers, enabling them to fend off encirclement by larger enemy forces. The effectiveness of this formation would be tested as Mahdist fighters sought to penetrate the square’s defenses, initiating a series of intense encounters that would define the battle’s outcome.
Artillery Setup and Strategy
British artillery units, a linchpin of their combat strategy, were garnering critical placements as the battle loomed. Equipped with heavy cannonry, including the Gardner gun, they were positioned to maximize range and firepower against charging Mahdist fighters. The strategy revolved around establishing effective firing lines that could deliver devastating barrages while minimizing exposure to enemy assaults. The success of this artillery setup hinged on maintaining a steady ammunition supply and ensuring swift communication among firearms units, thus creating an intimidating psychological barrier for Mahdist forces.
Preparations for Combat
In the hours leading up to combat, both logistical and psychological preparations were crucial. The British forces engaged in routine drills to maintain discipline under stress, fostering unit cohesion and morale. Feeding on the vision of a decisive victory, officers briefed their men on the operational strategies while emphasizing the importance of individual responsibilities within the larger framework of the formation. Understanding the stakes at play, British forces were resolute in their commitment to overcoming challenges that loomed ahead.
The Battle Begins
First Engagement: British Artillery Opens Fire
The battle commenced with the thundering roar of British artillery, signaling the beginning of a confrontation that would reveal the resolve of both fighting forces. As the Mahdist ranks surged forward, British gunners unleashed a hail of cannon fire, precision-targeting approaching units. The effectiveness of their artillery shocked many Mahdist fighters, who had expected an unyielding advance. This initial barrage served as both a deterrent and a psychological tool, exemplifying the British commitment to dominance within the battleground.
Initial Mahdist Charges
Despite the disorienting impact of British artillery, waves of Mahdist fighters charged forward, emboldened by their belief in their cause and the leadership of their commanders. Armed with both traditional weapons and limited firearms, they pressed toward the British square, displaying incredible bravery amidst the chaos. While the British strategy sought to exploit the disciplined formation, the uncoordinated assaults of the Mahdists were marked by fierce tenacity and a relentless determination to breach their lines.
Command Decisions Under Pressure
Under the pressure of the rapidly unfolding chaos, British commanders faced crucial decisions that would impact the battle’s trajectory. As Mahdist forces sought points of entry within the British square, directing artillery fire effectively and adjusting troop placements became paramount. Each moment presented new tactical dilemmas, as leaders grappled with adapting their strategies while securing troop morale amidst the chaos. The efficacy of command communication and the ability to adapt rapidly would prove decisive for British forces navigating this tumultuous environment.

The Course of the Battle
Duration and Intensity of Fighting
The Battle of Abu Klea, despite its brevity, unfolded with a ferocity that would leave lasting impacts on both sides. Measured in mere minutes, the fighting stretched beyond 15 minutes but felt like an eternity punctuated by the clang of metal and the cries of wounded men. This intensity thrust both forces into a tightly contested struggle, where gains were measured not merely in territory but in the preservation of honor and communal identity.
Critical Moments for Both Forces
Throughout the battle, critical moments emerged that altered the course of engagement. The Mahdist resolve faltered when key leaders fell, leaving their troops vulnerable to disarray. Similarly, the British faced their own crises of leadership, as injuries and casualties among the ranks put additional strain on the officers tasked with maintaining order. The effectiveness of training and preparedness would be tested against the harsh realities of combat.
Casualties Incurred During the Battle
The toll of the battle became apparent as casualties mounted for both sides. British losses included nine officers and 65 men killed, with over a hundred sustaining injuries. On the Mahdist side, the casualties were even harsher, with estimates ranging from 1,000 to 1,500 deaths. The heavy price of the battle emphasized the brutal nature of colonial engagements, where both sides fought valiantly for their respective causes amidst staggering loss.
Post-Battle Consequences
Immediate Aftermath for the British
In the aftermath of the battle, British forces experienced a complex mixture of victory and foreboding. While they had successfully repelled the Mahdist charges, the high casualty rates and the precarious state of their operational capabilities prompted strategic reevaluation. The euphoria of initial victory was dampened by the realization that the Mahdists remained a potent force and that further engagements awaited. Logistics and morale were a top priority as the British sought to regroup.
Mahdist Reaction to the Battle’s Outcome
For the Mahdists, the Battle of Abu Klea represented both a tactical defeat and a rallying point for further resistance. Despite suffering substantial casualties, they demonstrated their capacity to confront and challenge British forces head-on. The call to arms resonated deeply within the Mahdist ranks; the experience at Abu Klea galvanized support for the defense of Sudanese autonomy and fueled the insurgency’s momentum in the months and years to follow.
Strategic Reassessment by British Command
The British command initiated an urgent strategic reassessment in the wake of the battle. Recognizing the need for more robust engagements and reinforcements, discussions centered on troop mobilization and re-evaluation of objectives in the region. With growing concerns about the failure to relieve Gordon in Khartoum, the stakes were increasingly high. The juxtaposition of previous colonial victories with the challenges faced in Sudan illustrated the evolving dynamics of British imperialism, marked by lessons learned amid adversity.
The Fall of Khartoum
Implications of the British Withdrawal
The eventual British withdrawal from Sudan following the fall of Khartoum had profound implications for the region. The inability to protect Gordon and uphold British interests signified a palpable decline in the Empire’s influence and prestige. As local populations witnessed the collapse of British military might, it encouraged perceptions of vulnerability among other colonial holdings, inciting both fear and opportunism.
Impact on General Gordon’s Fate
General Gordon’s demise became emblematic of British imperial failings. Having invested significant resources and political capital in his defense, his death served as a somber reflection on the complexities of colonial governance and military engagement. Gordon’s legacy would be steeped in martyrdom, propelling narratives of heroism and sacrifice that would reverberate throughout British society and beyond.
Long-term Consequences for Sudan
In the long term, the Mahdist victory left indelible marks on Sudanese society and the geopolitical landscape of North Africa. The Mahdists seized control, initiating a period of rule that lasted for over a decade. This period not only represented local governance but also fostered an evolving sense of Sudanese identity, one that would later fuel nationalist movements. The implications of the uprising and subsequent resistance would inform Sudan’s historical trajectory, creating lasting consequences for its future.
Conclusion
Summary of Events
The Battle of Abu Klea stands as a pivotal moment within the broader context of colonial struggle in the late 19th century. What began as a relief mission turned into a fierce engagement that highlighted the clash of wills and ideologies between the British Empire and Sudanese forces. The courage and tactical decisions on both sides shaped not only the immediate outcomes of battle but also left lasting legacies through the ages.
Reflections on Colonial Military Engagements
Engaging with this chapter in colonial history requires critical reflection on the complexities and moral ambiguities of imperialism. The juxtaposition of military might and local resistance conveys a narrative steeped in conflict, survival, and the reinvention of identity in response to foreign domination. The study of such events challenges popular narratives and raises questions about the ethics of power, autonomy, and the consequences of warfare.
The Ongoing Legacy of the Mahdist Uprising
The Mahdist Uprising serves as a broad symbol of resistance against colonial domination, reverberating through subsequent generations of Sudanese and global history. The battle, while marking immediate tactical engagements, inadvertently laid the groundwork for future national movements that would challenge and redefine the concepts of sovereignty, identity, and political agency relevant to today’s discourses surrounding liberation and autonomy. As such, the legacy of Abu Klea and the uprisings it catalyzed continues to find relevance in contemporary discussions regarding post-colonial struggles and the quest for self-determination.